Friday 29 April 2011

ONE YEAR

ONE YEAR!!!!

One year from today and my thesis film Porcelain is due!

So dear readers, I created this blog so you can enjoy reading about the trials and tribulations of filmmaking!


My film idea in a nutshell:

Porcelain: In a society where children are seen and not heard, a young girl is lost in a world of precious and fragile objects. As she is perpetually surrounded by silence and isolation, her vitality begins to fade and she gradually transforms into one of the delicate, inanimate porcelain dolls.   

Poster Design 


First Version of the Story

It’s been a while since I’ve tackled the story telling side of my film. I’ve been preoccupied with learning the ins and outs of CG and building Anna.

Here are some storyboards that I made last year. Since then I’ve decide to change quite a number a details.


The Story (Last year’s version)

Part One: The film starts with an extreme close up focused on a child’s eyes. The eyes are searching or studying something intently. The next shot is an extreme close up of the eyes of a porcelain doll. Coupling these shots will contrast the life in the child’s eyes with the inanimate eyes of the doll. The camera pulls out to a close up of the face of the child as she continues to study her doll. Her hand comes up to the doll’s face and tentatively fixes the doll’s hair. Suddenly a shadow falls across the girl and her doll. The child looks up to see a figure silhouetted in the door frame. The figure is the child’s mother who beckons to the girl. When she reaches her mother, the mother grooms the child in a manner similar to how the girl groomed her doll. The gesture is mechanical and without affection. In my representation of the mother I will frame her so her face is never seen, both as homage to old cartoons and to keep her emotionally removed from the audience. The mother presents the child with a beautiful music box, again in a manner that reveals their remote relationship. The girl reaches for the box but the mother snaps the lid shut and raises the music box out of reach. The mother then turns away, once again leaving the girl alone. The last shot of this segment cuts back to a close up of the from the music box ballerina spinning around and around. This shot cross dissolves into part two.

Part Two: Mimicking the spinning motion of the ballerina in the previous shot, the camera circles the little girl as she is having a tea party with the china doll established in part one. Behind the child, the room is in a constant state of metamorphosis. Beautiful objects continue to accumulate. In this shot there are two separate times working simultaneously. In one, only seconds go by as the child raises the teacup to her lips and then places it back on its saucer. In the other, weeks or months flow by as fragile objects continue to surround her. The scene ends on a sound cut of the teacup hitting the plate.

Part Three: Matching the sound of the teacup the girl awakens to the sound of thunder. Rain beats against the windows of her room. Yet there is also the faint sound of the music box. As if in a trance, the girl gets up and moves towards the music which steadily increases in volume. By the time the child reaches the music box, the music has become all encompassing. She slowly reaches out and touches the ballerina. As she makes contact, the child begins to change; her flesh turning to porcelain, moving up from her limbs to her head. She begins to cry as the transformation reaches her face freezing a teardrop on to her china doll cheek.


I find the version above to be a little melodramatic.

I hope to have a new animatic done for June, so stay tuned!

Here’s a sneak peak! 


Rigging Anna

RRRRRRIGGING!


Does it look hard?! That’s because IT IS!

As my friend Sean said, it’s the rocket science of CG.

(Sorry, misquote. What he actually said was, “CG is the rocket science of art.” Just thought I’d set the record straight)

Entering the most technical aspect of an already technical art form.

Deep breath.

Here we go.

So what is rigging?

Well my dears, simply put rigging is when you give a 3D model the means to be mobile.

Defining it was easy. Doing it certainly isn’t.

So where to start? Well some of you might have noticed that I’m not in Maya anymore. Instead I have entered the realm of Softimage. This is because our Softimage teacher, Mr. Adam Sale, is also a fantastic rigger.

My plan for making Porcelain is to model and texture in Maya and to rig and animate in Softimage. Using a method call point cashing I can take the animation of a model in Softimage and assign it to an identical model in Maya. 

Needing identical models is going to come into play later, as it will cause me some grief down the road.

What I knew going into rigging was this:
All those “Good luck with the hair and dress” comments were mostly referring to the rigging phase.

So rigging! (or singing)
Toe bone connected to your foot bone
Foot bone connected to your ankle bone
Ankle connected to your leg bone.
Dem bones, dem bones, dem dry bones.
Now hear the word of the Lord.

That’s right, if you can sing this song, you too are a rigger. (I’m lying)

The first step of rigging Anna was constructing her skeleton. Remember back in the modeling post when I said that the edge flow or topology of a model would be important later? Well guess what, it’s important NOW!
When building the skeleton, the bones are placed in accordance to edge flow.

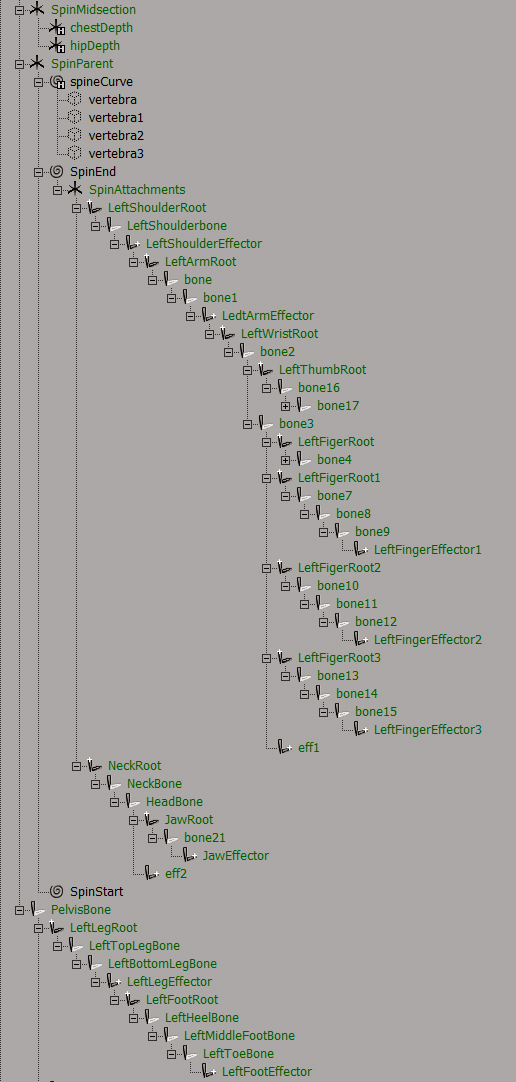
Al so I should mention that you don’t exactly just make bones, you make something called a 2D chain.  2D chains start with a root, then you have your bone or bones (you can have as many bones as you want in a chain) and you end with an effector.

NAME EVERYTHING! You end up with a lot of stuff going on in rigging. Proper naming and organizational skills are so important. Otherwise you’ll end up drowning in arbitrarily numbered bones, roots, effectors and nulls.

Once you got all dem bones in place you start creating a hierarchy so the
Shoulder bone will move the Arm bone
Arm bone will move the wrist bone
Wrist bone will move the finger bone

hierarchy


That’s the easy part.
How our body moves, unfortunately, is far too complex to be emulated by just layering in a couple of bones.

So
 Adding squash and stretch to the spine!

Squash


Stretch


Arm twist! Rotate your wrist. Does it pinch up like when you twist a ribbon? No? Well that’s what this is for.


Foot roll!


BOOM!

And I’m done. That’s all the tricks I got.

Enter the amazing Mr. Adam Sale.
(Applause)

Time to deal with the dress and the hair.

Bah! The hair! Do you remember what a pain it was to model? How horrid the UVs were? How the texturing has already taken several days and it’s still not working?

Now it’s time to rig it, the hardest part right?
Wrong?!

Here hair, have a lattice.
The box on her head is a lattice


DONE! (Not really, there was actually a bunch more steps, but in case you haven’t noticed I’m glossing over a lot of information)

Dress time! The hair was easy, the dress shouldn’t be a problem, right? Right?
WRONG!

I don’t know what Adam did, something with curves, nulls and some bones that drive the whole thing.
I couldn’t follow because my brain started leaking out of my ears.


PANIC!
As I said rigging and texturing are happening simultaneously. At this point I’m also struggling with the hypershader over in Maya.
There’s nothing I can do right now without either Kert Saville or Adam Sale holding my hand through the whole processes.
I’m in over my head!
I don’t know what I’m doing!
HELP!!!!
!!!!

Ok.
Ok. I can do this. I’m not dead in the water (yet).

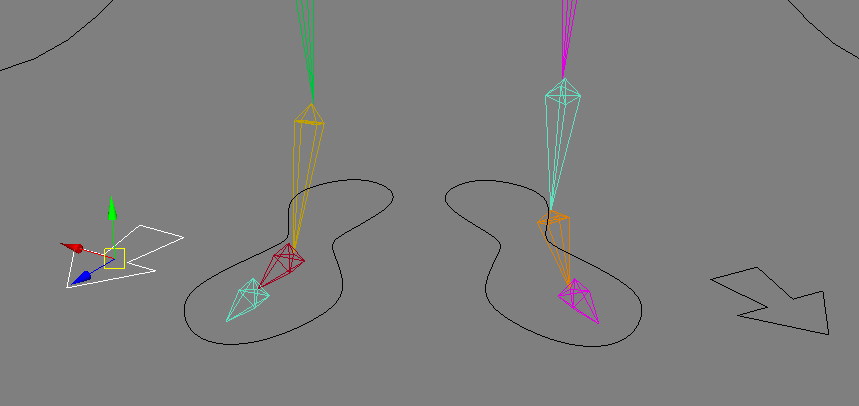
So the skeleton is ready to roll.
Kert said she looks like a Christmas tree

 It’s time to start weight painting.

Up until this point I have been building a skeleton that is based on Anna’s mesh. Based on but not connected to. Weighting is when you envelope the mesh to the deformer group (for simplicity’s sake, the skeleton) and then start assigning what deformer (bone) has influence over what part of the mesh (model).

Let’s talk real life for a second. Look at your hand. Now make a fist. Your skin and your bones move together. Think of your skin as the mesh and you bones as the deformers. Now you understand the goal of weight painting.

like a pretty rainbow


It’s a lot easier said than done. Do you understand the subtlety of how the skin and muscles deform when you move? Watch the bunching of the skin on the palm as you move your thumb to your little finger. Have you ever really thought about this before?

I would definitely suggest getting into CG if you are interested in human anatomy. In my third year at Emily Carr I took an anatomy class. All we did was sit around and draw old bones and memorize a bunch of big words, most of which have leaked out of my head by now. But this year working on Anna has forced me to pay attention to so many details of the human form that I had overlooked or never even considered noticing before. I feel that I understand a lot more about how the body works because I’ve had to construct one. There is so much about our form that we never consider, so much about our movements that we don’t understand yet do constantly. Can you express the correlation between your hips and shoulders when you walk? Do you really know what your face is doing when you smile? Are you aware of the rotational limitations of your arms?

Working in CG has forced me to really study anatomy through emulating it. I may not remember the names of the muscle groups in the hand, but I sure understand them a lot better.

After the weight painting is finished the body portion of the rig is done.

Moving on to the face.
 I would say I’m maybe fifty percent done at this point.

There is a couple of different ways to rig faces. I chose face shapes.
How face shapes work is you model several different types of eye brow, eye and mouth expressions.
These are examples of shapes: brow up, eyes closed, squint, smile, puckered lip. There are several more.

example of puckered lip face shape


example of eyes closed

Again, sounds lot easier than it is. Remember in the modeling post where I discussed the difficulties of getting the mouth corner right? Well now I have to deal with that about 10 more times.

The smile is by far the hardest of the mouth shapes to do.  Earlier in this post I asked if you understood what the face does when it smiles. I certainly didn’t.  The knee jerk reaction is to turn mouth corner upwards.
Like the yellow smiley face. 

It’s a lie.

The smiley face is a lie.

What a smile actually does is engage some muscles which pull the mouth back causing the lips to tighten over the teeth.  
It’s weird.

The sad tale of Anna’s eye brows.

-At this point in the game I had decided to paint on Anna’s eye brows through texturing.
-The design of the brows is very long because I wanted to emulate the look of Victorian porcelain dolls.

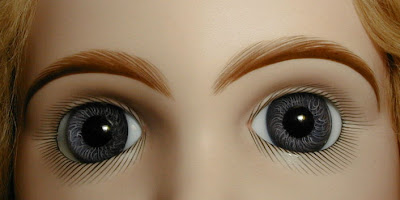
example of the long brow look 
-To cut down on render time, I tried to be poly count conscience when modeling Anna’s head.
-Because I am more comfortable rigging in Softimage, I decided to use point cashing to transfer animation onto an identical mesh in Maya.   

These four facts, though good ideas on their own, somehow coagulated into one of the most difficult problems I have encountered so far.

When I started modeling the brow face shapes, I quickly discovered that I could not make Anna’s long eye brows expressive enough because of the limited geometry in her forehead.

To get the brows to emulate the desired emotion, Anna’s head would become so warped that she looked like someone beat her in the head with a shovel.

Not very good expression


Look at the weird lumps in her forehead  


Usually an easy fix.
Simply add more edge loops.
Except
That would change the mesh, and the mesh needs to be identical to the one in Maya.

BIG PROBLEM!
 Big, big problem!
ANNA’S FACE IS THE MOST IMPORTANT PART OF THIS MOVIE!
SHE NEEDS TO SHOW EMOTION, DAMMIT!

FFFFFFFUUUUUUUUUUCCCCCCCCCC-


k.
ok.
I’ll just model the eye brows separately. (I also made eyelashes because it had to get done sometime)

Now the consequences.

A little more information on face shapes:
Once you make all the face shapes, you create a weight map for the left and right side of the face.
 You take every face shape and make two more copies of it.
Then you take the copies and assign them to a weight map.
 Take Eyes Closed for an example. Eyes Closed is the original face shape. Make two copies, assign to weight maps. Now you have Eyes Closed, Eye Closed Right, and Eye Close Left. The eyes now have the ability to shut separately from one another.  

eyesclosed face shape


eyeclosed face shape with left weight map


eyesclosed face shape with right weight map


It’s a very neat process because you can get a lot of expressions from a limited amount of shapes.

However, with the new brows and eye lashes…

For every face shape involving the eyes and the eye brows, I now need to make matching shapes for the separate brow and eye lash meshes.
Then they all need weight maps and copies for the left and right side.
So
What was once a single shape
Now has the potential to become nine.

That’s not all.
Because the eyebrows and eye lashes need to follow the face mesh,
I have to hook them all together so the face shape drives the other two meshes’ shapes.

Fun.

Fifty thousand steps later and

the face shapes are ready to be connected to the face control panel through an ice tree. (For those of you that have no idea what this sentence means, WELCOME TO MY LIFE FOR THE LAST EIGHT MONTHS)
(I’m feeling spiteful and am no longer explaining things for a while)

But!
I’m near the end, I can taste it!
After this it’s done!

After a horrid picking session with the ice tree (still not telling you) that takes another hundred years
And 
Let try these face controllers out (Very nervous right now)

….

NNNNNNNNNNNNNNNNNNNNNNNNNNNNNNNNNNNNNNNNNNNNNNNNEEFFFFFFFFFFFFFFFFF
EEERRRRRRRR
NNNNOOOOOOOOOOOO!!!!!!!

(Sob)

I need Mr. Sale’s expertise.  Less than half of it is working and I have no idea why.

He’s sick

Shit.

THE END


Did I scare you?
No, it doesn’t end like that.
I’m just going to write about the end of rigging now.  “The End” three lines ago is just the title for this next section.

Thank goodness for smart people like my friend Lillian Wong.
Because of her help I was able to get the majority of the face sliders working.
Except for one.

Adam Sale returned today and fixed the slider.
And I tied up a bunch of loose ends
Yippy! Dare I say I’m done?
 Better double check.
Looking good!
Oh
Wait.

Another slide has stopped working.

Sigh.


Texturing Anna

Texturing my model was something I GREATLY UNDERESTIMATED in terms of time and difficulty.

Also, unlike the design and modeling posts, at the time that I am writing this the texturing for Anna is incomplete. There are still quite a few problems that I have to work through before I can refer to them in past-tense (too bad! the best way to discuss problems is always in the past-tense).

For those of you that don’t know, texturing in CG is a series of processes that assigns material attributes to a mesh. Let’s speak about the real world for a sec (“you mean in real life?”). Take yourself for example, look at your skin, and then look at your clothes. Your skin and the fabric of your clothes are extremely different.

Now look at Anna.


Currently there is no difference between her skin and her dress.  That’s what texturing is for.

To start the process of texturing, one must first unwrap UV? This isn’t always the case but I’m not going to get into it).  UV unwrapping is by far the WORST PART OF ANYTHING 3D! 

So what is UV unwrapping?

Well, I’ll tell you. 

What you’re doing is translating a 3D object into 2D space in order to use 2D software (Photoshop) to paint your model. Think of it like taking the paper off a birthday present (except you don’t get a present at the end so it isn’t any fun), or what sewing patterns are to making clothes.

Anyway this process is a pain in the ass because it takes a lot of time and effort but there’s nothing really to show for it.

Here is Anna before UV unwrapping:


Here is Anna after.


To be fair I should have shown this as the after picture.


Those checkers mean something in case you couldn’t guess.

I’m sitting here trying to think of an interesting way to write about UVs but I honestly can’t seem to do it.
So I’ll just say this:

UV unwrapping is hard, boring and time consuming.

When describing it I always equate UV unwrapping to unwrapping presents, and organizing UVs to Tetris so it should be fun right?
 WRONG!

Anyways this is what you end up with, UV TEXTURE MAPS!


I have nine UV maps for Anna’s character because there are nine different types of materials.

FUN GAME!

See if you can match the UV maps to the right mesh by assigning a number to a letter!


Answer Key:
1-I,   2-E,   3-B,   4-A,   5-L,   6-H,   7-K,   8-G,   9-D,   10-J,   11-C,   12-F 
 
Now with the UVs all mapped, it’s time the leave Maya and the 3D world and venture back to Photoshop and the land of the 2D for some good old fashioned digital painting.

Little bit of a hiccup!

What colour is Anna’s dress?! 

Bah! Head space where were you on this one? It’s always a bit bizarre running into these sorts of problems. I’ve been picturing Anna in my head for the last month, how did I not know this? How did I not realize that I didn’t know this?

More specifically I didn’t know anything about Anna’s clothes: the colour, the fabric, the embroidery  -- nothing!

So I did what I always do in these situations, BACK TO REFERANCE IMAGES! 

Here are some:


Most helpful
This picture, in particular, really got my head working in terms of how to work Anna’s clothes. Truth be told, I am really not very fond of this jacket. It’s a little too anime inspired for my taste.  However, the cage motif really caught my attention. During this process I had also been working on a mural design for Anna’s room. If you want to see it just take a look at the back ground for this blog. As you can see I went with caged birds, hoping to invoke a little symbolism. It hadn’t occurred to me to use a cage design in the embroidery of her dress.

Hesitation! If I also did cages in the dress would I be beating the audience over the head with symbolism?

Nah.

Here are some of my colour maps so far:


Interesting bit of trivia! I spent over 24 hours drawing lace for this dress.

Take a look at the detail:


A bit of lace history:
Back in the day, lace was all hand crafted and very expensive. Only the wealthy could wear lace. However, with the advent of the industrial revolution lace became manufactured and more affordable. This allowed more people of less financial means to also wear lace, bridging the gap between classes. In the Victorian era, lace is associated with the rise of the bourgeoisie or middle-class.

Back to texturing:

 Before I start discussing the nightmare that is Anna’s hair, I think I need to do a better job of explaining the texturing process. The maps I posted above are colour maps. Colour maps are one of several types of maps out there. There are also; spec maps, bump maps, crazy bump, normal maps, diffuse maps, transparency maps and several others. Any material can have any number of these maps on it.

So far for Anna’s hair I have created a colour map, specular map and normal map.

A specular map controls the specular reflectivity of an object. Let’s talk real world for a second. Think how light reflects differently on different objects, like a new car’s shiny surface compared to a cotton shirt’s dull one. Specularity plays a huge role in how we perceive and understand the qualities of a material.

Still thinking real world, think of a brand new IPhone (so shiny) now think of an IPhone after it’s been used.  The screen’s specularity has changed in the places where it has been touched because of the grease on our fingers. To emulate this in CG you would use a spec map!

To make a spec map you use a grey scale to paint. White represents the maximum amount of reflection where black has no reflection.

On to Normal maps!
Working in 3D programs is extremely demanding on computers, because there is so much information. In order to work in a 3D program the user is only shown the essentials. 

What I see in Maya. Check out rendered Image later in post.

Rendering is the process where the program gathers all the information in a scene. This can take an extremely long time (several hours or even days) depending on how much is going on. So obviously you would want to limit the amount of information without limiting detail.

NORMAL MAPS TO THE RESCUE! They create the illusion of depth without the depth. Without a normal map you would have to add more polygons to a mesh thereby increasing the rendering time.   

To make a normal map, I took the hair mesh from Maya and imported it to a program called ZBrush. ZBrush sculpting is a lot more like how you would sculpt clay in real life. Anyways, I added a lot more detail. I then created a normal map from the ZBrush mesh to bring back to the hair mesh in Maya.

Making a normal map in Zbrush


Here are the three maps for Anna’s hair so far:


Great! Now that I have spent all this time making these maps, Anna’s hair should look fantastic, right?
WRONG!

And now things get hard.

My head stops working.

ENTER HYPERSHADER!

For those of you who still believe that computer animation is just a magical button click to awesome – I hate you.

It’s never easy.  Ever.

The hypershader is the more technical side to texturing. It combines all the different aspects of what goes into making a material.

Here’s a picture.

For Anna's hair

Looks like a messy spider’s web to me.

I got a lot of help at this point from my friend, Kert Saville, who is very good at the technical side of 3D programs.

Good thing I sit next to him because it seems when my brain shuts down, his brain turns on.

Here are my first fully rendered images of Anna.


The reason it looks any good is because of Kert.

I’M GETTING WORRIED!

Here comes the self doubt.

Maybe choosing to do my thesis film using 3D animation was a poor decision. I thought taking a year off from Emily Carr to learn the ins and outs of 3D at Capilano would be enough. But now at the end of my time at Capilano I feel like I know just enough to know that I know nothing.

I’m not going to have the knowledge and technical skill of the Capilano teachers and students at my convenience very soon.

I have greatly underestimated this art form.

How does this just keep on getting harder as opposed to easier?

One of the major differences between good and bad CG is the lighting/texturing. Can I really expect to get my work looking professional when I only have a year to complete this film?

I’m running out of time and problems I never even dreamt existed are popping out and becoming MY REAL WORLD.

Here comes the self reassurance.

I’ve only been doing this for eight months and look how far I’ve come. Imagine how far I could get in the next twelve months.

I’m not expected to know everything about CG. It’s absurd to try and be a modeler, texture artist, rigger, lighter and animator. I need to learn how to let go and delegate. That’s what good directors know how to do.

I’ve got some idea of how to rig. Kert (who is also very good at rigging) says that rigging is harder than the hypershader. Therefore I can probably learn how to work the hypershader.

Here comes the conclusion.

I have a year – ONE Year – and it’s going to be one HELL of a year.